6 Best Tips on How to Get Paint off Tail Lights
Being the owner of a vehicle involves a lot of work. For starters, a car is an investment on your end, requiring various amounts of upkeep every so often. The tires on the vehicle may become deflated after a prolonged amount of use. Or, the exterior may need a deep cleaning, in order to restore its sheen and visual aesthetic.
Painting your car, whether if it is the first time or not, requires you to be very careful. One wrong move may see you painting over a component that can be hard to clean afterwards. Your vehicle’s taillights, for example, may be covered over with paint.
To get this stubborn part cleared from all traces of paint, here are tips on how to get paint off tail lights:
1. Get paint off quickly

Your tail lights will generally be covered by a hard plastic shell. Not only does this protect the light inside of the casing, but it helps with illuminating dark areas as well. You’ll want to keep this part of your car free of any and all obstructions, at all times. If not, it could impede on your ability to signal to others while on the road.
Should you find yourself painting over your car one day, you may accidentally paint over your tail lights. Before the paint dries, have a cloth nearby. Acting quickly, in terms of wiping off the paint before it solidifies, is of the utmost importance. While cleaning off the paint is possible, it can get trickier once it dries out on the surface.
2. Remove the tail light

Always remove the tail light fully before you work on getting the paint off. This allows you to try different methods of cleaning, without fear of making a mess on the rest of the car. Disassembly is not as difficult as you’d think; no need to worry about creating further mess as a result!
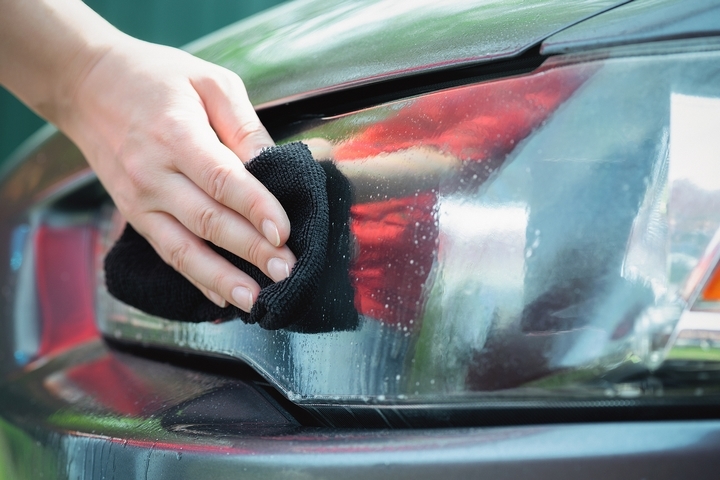
3. Wash off the tail lights

If a cloth is not in your vicinity, you may have a bucket of water instead. Painting jobs of any kind will require water, in order to wash off areas before they are primed. The same sentiment can be applied to painting your car; having a bucket of water nearby is paramount. To ensure that your tail lights are clear, simply wash them off.
A hose could be much more practical to use, provided you don’t wash off surrounding areas if they are painted. Or, if you want to be a little more careful in your approach, grab a damp cloth. Rub the tail light with pressure, until all visible traces of the substance have been removed. Water is your best weapon here, if the paint has yet to solidify.
4. Lacquer thinner

Should the paint on your tail lights prove to be much more stubborn, you’ll need to use another strategy. A great tool to use here, in case the paint has dried out, is lacquer thinner. This chemical substance is great for getting rid of other properties that cannot be easily removed. It has a strong solvent contained within, allowing the removal process to be conducted.
To begin using the product, apply a small amount to the tail light in question. After it has been applied, it will begin to dissolve all traces of paint, until it is ready to be removed. Leave the thinner to work as intended for a set amount of time, and then wipe it off with a cloth. Your tail lights will look as good as new!
5. Denatured alcohol

There are many instances of rubbing alcohol that can be of great use, especially when trying to remove substances. The same can be said when trying to get rid of paint that has dried out on your tail lights. Denatured alcohol, a chemical compound, can be applied to the painted spots in question.
Once applied, it will begin to dissolve the dried out paint. It will take some time for the substance to weaken, before it can be fully wiped off. After enough time has elapsed, wash the area off with water and grab your handy dandy cloth. Proceed to wipe the tail light off, and you should be good to go.
6. Buff and Polish

In some instances, you might want to try this unorthodox method out. First, wet and sand the tail light, as you would for other buffing processes. The paint should be removed at this point. Afterwards, gently buff and polish it, and the tail light should be as good as new!
Thankfully, tail lights don’t have to be too much of a hassle to clean, if you act quickly. The more time that passes, the more challenging it becomes to get rid of. With the right tools behind you, your car will be in pristine condition once again!